

How To Make Speed Drawing Videos
Video
Record your artistic process to a Time-lapse video, and share it with the world.
Create Time-lapse Video
Time-lapse video records every step of the creation of your image. This then compiles it into a high-speed video replay you can export and share.
Time-lapse video is enabled by default when you create a new canvas. It will record your progress at 1080p resolution on the Good Quality setting.
These settings cannot change mid-project, but they can be adjusted before you begin.

Custom Settings
Create a custom canvas to tweak your Time-lapse Video.
From the Gallery, tap the + button in the top right of the screen. This will bring up the New Canvas menu. In the top right of that menu is an icon made of two rectangles with a small + symbol. Tap this to bring up the Custom Canvas screen. Tap Time-lapse settings.
From here, you can tweak the Time-lapse Settings for your new Canvas. Select the resolution of your video from 1080p to full 4K. Tweak recording quality settings from Low (small files, good for sharing) to Lossless (large files with no loss of detail).
HEVC is a new form of video compression for advanced motion graphics creation. It is off by default, but can be toggled on.
When you're happy with your Time-lapse settings, tap Create.
Insert a Private Layer into a Time-Lapse Video
Insert a File or Photo as a Private Layer that won't appear in your Time-lapse Video.
Private layers are ideal for obscuring reference images and other content that isn't a part of your final artwork. You can do this without having to delete or turn off the private layer in your file. A Private Layer works like a regular layer in all aspects, except it will not appear in an exported Time-lapse video.
Find out more on how Private Layers work in the Actions / Add section.
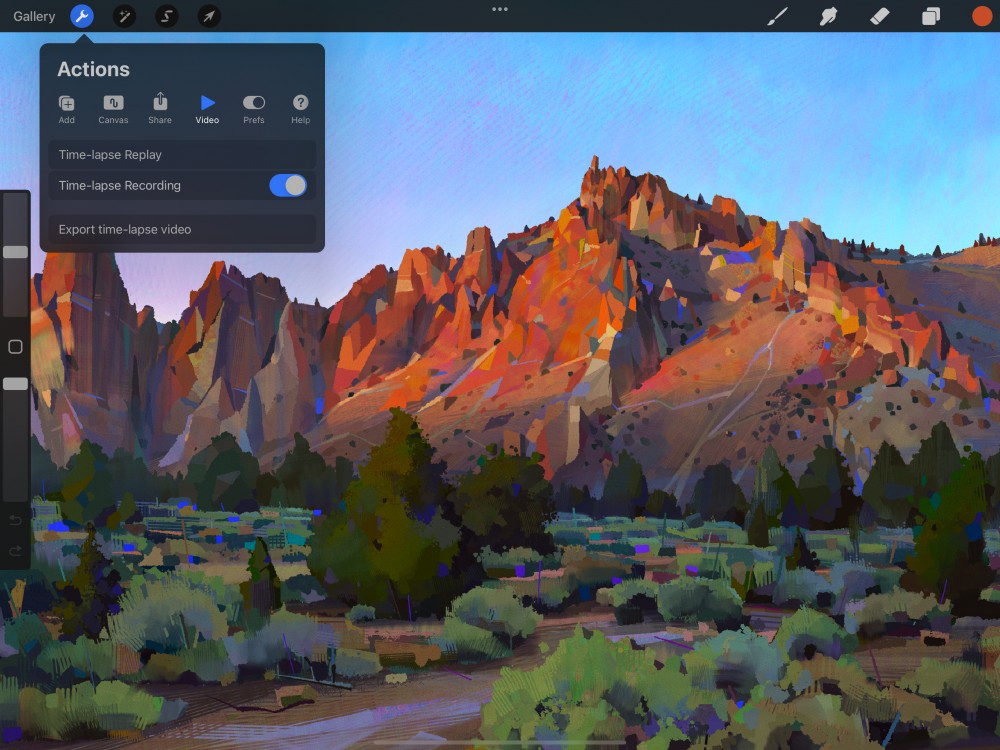
Disable Time-lapse Video
Turn recording off completely.

Time-lapse video is on by default. Using the Time-lapse Recording toggle in Actions pauses the recording on your current canvas only. Recording will continue on any other canvases, and on all new canvases.
To switch recording off completely across all current and future documents, tap Help > Advanced Settings.
This will take you out of Procreate and into to the iPad Settings > Procreate menu. Toggle the Disable Time-lapse switch.
Remember, this turns off Time-lapse by default on all documents from this point onwards. It will not be enabled on any new documents you create, and it does not record when switched off. You cannot go back and retrieve a recording of a document afterwards if you change your mind while Time-lapse is disabled.
Time-lapse will stay deactivated until you repeat the process above to switch it back on.
You can also access Advanced Settings by tapping on the iPad Settings icon. From here, scroll down the list of apps to the Procreate section.
3D Preferences
How To Make Speed Drawing Videos
Source: https://procreate.art/handbook/procreate/actions/actions-video/
Posted by: churchwolleationg1967.blogspot.com
0 Response to "How To Make Speed Drawing Videos"
Post a Comment